OK, everyone loves christmas crackers, right? BUT they have such naff pressies, they are way too small and they are all a bit samey.
The answer?
DIY...
Here are this year's "crackers" - golden gift boxes with pyrotechnic caricature heads that also provide the opening mechanism AND mildly offensive audio - what could be more delightful?!
They were also stuffed with goodies, hats and dodgy jokes, but this post is not about the contents.
The boxes are about a foot long and roughly six inches wide and tall. The head on each box is a mildly insulting but largely warm caricature, based on the person who would receive each box.

Here is one box in detail. This one is me.

Start with a bang...
Fuses give an enjoyable anticipation like Mission Impossible. This was exciting with four lit at the same time. You know they are going to kick off, but you don't know exactly when, so it still makes you jump when the charges blow. With four going off in quick succession, it got smoky. Safety goggles were provided.
Immature opening mechanisms...
Of course, all good gift boxes should have twisty wooden heads that mildly insultingly caricatured their recipient to open them and - also of course - they should have some sort of vaguely offensive and unexpected interjection (or is that just me?)
Here's another one...
Build
The build for the crackers involved woodcarving, box-building and making a lock mechanism.
Carving the heads
Now these things start as scrawls...

And then start again as logs...
This is a section of an oak branch.

This was held in place in the vice with a squared oak block screwed onto the bottom.

The screws are about 2" long. The screw holes need pilot holes in the log, or the log will split along the grain. The wooden block holes also need countersinking or the block will split.
Here's a side view.

Roughing out
The first job is to rough out the basic form, but without any detail.
The tool for this is the awesome Arbortech. A lovely tool to use and its power makes this no real physical effort and allows you to be surprisingly subtle. You can almost stroke off the wood.
The eye and ear protection is essential though. oak chips are rock hard and fire off at high velocity.

This means a protective cordon needed to be built to keep out inquisitive Betty pug...

This head used the natural shape of a sub-branch as the nose.

You can see before and after here...

After a little while, the shape emerges. It is important to block out the basic form. No attempt at detail should be made here until the shape is established.

A little while later. By this point, I'd started using the rotary carving burrs in the die grinders (top two tools). They are able to get in and make subtle concave shapes that the Arbortech is too big to do.

This head is only about 6" high, so you need the more delicate die grinder. Having said that, they are also pretty powerful tools, so it is not a lot of physical effort. It is more about having a good grip and being subtle to stop the burrs grabbing the wood and careering off across the face of the carving.

From the other side...

Once roughed out, the basic features of the face were sketched onto it as a carving guide.

This is the last stage of roughing out. The shape of the eye sockets etc are starting to be formed, but still no real detail is done until the form is in place.
The mental process I use for this is is something like taking the finished shape in mind and mentally squinting at it to ignore the details.

Below - roughing out finished. This is as far as you can go with the die grinders.

Here is the roughing out on another head. Here we are at the Arbortech stage...

From the back - the lobe at the back of the head is starting to develop...

Again, after blocking out hairline and ear blocks, the facial features were sketched out...


These are quite small pieces to carve.
For scale, here is a life-size mannequin head.

Sometimes, it helps to sketch out the blocks. This head had a large top-knot shape hat needed forming early on...

To re-iterate, it is vital to stick to the big block forms. The sketch lines are deliberately crude and approximate. This helps keep discipline.

Here is the fourth and final head, just about to start roughing out...

It's called roughing out for a reason.

What starts like this...

...develops into this...

The four heads after roughing out. Each one took about 4 -6 hours


Some side views


Detailed carving
For the detail, the carving was done by hand using woodcarving gouges and chisels. I love these tools.
Chisels give a super clean polished cut, but there are some details that really are best done with a Dremel using micro-burrs and drill bits (especially the inside of ears and tiny teeth inside grinning mouths)

This is one of the heads just after the initial hand carving has started. The smooth cuts that chisels make are visible under the hairline, and especially on the eyes.
In this picture, the eye on the left is still in its roughed out form. The eye on the right has had its eye-socket, eyelid and eyeball detail cut out in initial detail, using a v gouge and some almost flat curved gouges

Before...

After...

After a while, the detail of the facial features were carved out in the same way


I've jumped a load of work here. This one is almost finished. It has had its ears shaped with a Dremel and micro-burr. Attempting that at this scale in oak with a chisel is asking for trouble. Oak splits quite easily and for detail at this scale, it's too risky. The ears here are less than an inch tall.
The neck has also had quite a lot of shaping using a power sander to smooth it down.


This shot of another head shows the subtle work that the Dremel can do. The eyes, nostrils, cheek muscles and teeth were all shaped using micro-burrs (between 1.5 and 3mm wide)


On the left is another head that has only just started being worked on. The ear on the right has started to be carved out.

This is what the micro-burrs look like. They are mounted in a pen-grip chuck on the end of a flexible extension for the Dremel. It is being used here on the eye sockets. The hair detail was again cut with a v gouge chisel


Building boxes
OK, so once I had got some heads, they needed boxes to sit on. I made these to vaguely resemble plinths. This was a nod to the fact that they would carry sculpture.
I didn't make them identical, but they are all roughly the same size within a cm or two. The board is 5 layered plywood from packing crates. I had reclaimed these boards previously from a skip.

Here are the box pieces being dry assembled. The pieces are not fixed together yet.


The base of the box carcass had a recess routed into the internal edge to fit the base. These were pinned and glued in place. The pins were punched into the wood and filled with PVA and sawdust paste as a filler.

This shot shows the sticky fibrous goo that PVA and sawdust makes. It is very strong.

The boxes now pinned and glued...


You can see the mitres more easily in this shot.


To even them up I sawed the base logs off the longer heads, thus.

and thus.

Now they were roughly in line with each other for height. They were still not that consistent. but that was not especially important as they were not to any scale anyway.

Making the box lids and locking mechanism

Initially I had been thinking I'd create a lever-handle release mechanism that somehow also set off an explosive bang. They were meant to be sort of crackers after all.

I did some trials using party poppers are detonators for a gun powder charge. However, this was not reliable, so I went back to the drawing board...

Eventually I decided upon a kind of double mortice bolt-locking mechanism to secure the box lids. This was based on having one end of the lid held in place by two dowelling lugs that sat into recesses in the box's inner wall.
This meant that one end of the the lid could be hinged open, but not lifted straight out. At the other end, a small wooden stop inside the box allows the free end of the lid to rest. By adding two bolts at the free end, the box could easily be locked.
Hinged dowel end...

And with the lid in place and closed. You can just make out two markers in pencil, which were drawn to estimate where the bolts might lie

I wondered initially if the bolts might be on a rotating cam as below. This would mean they shifted angle as they were locked and unlocked, so I abandoned that idea.

I restarted the bolt design by making the bolts both fit into a single guide channel, so they would be in line. I decided that I could work out how to move them later, once the bolt action was sorted.
The bolts are fairly thick flat rectangular brass bars. These were cut from a piece of brass pipe (see below)
You can see the bolt handles. They were made from aluminium rivets.
The left hand handle as seen here, has been turned to the desired shape is ready for rivet ting onto the bolt bar using a hole in it's inner end. The right hand handle is the basic rivet before turning to the right shape.
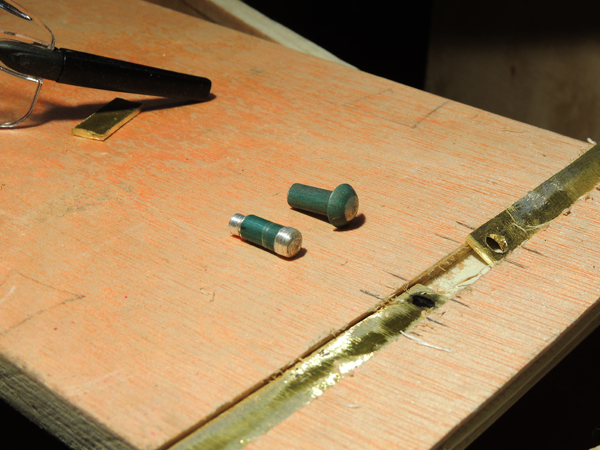
This is an end shot of the original brass pie from which the bolts were cut. This was done by eye using an angle grinder.


Later on they were beaten flat to get rid of the slight curve. They were cut to the same length and then ground to the same width before finishing with a sander.

This shows them close to the final matching shape and size.

Once the handles had been riveted on, the bolts were held in their guide channels using brass plates. You can't see it easily, but the plates were shaped to have a central lowered recess to fit into the channel more snugly.

The cam only closes the bolts. It cannot open them. For this reason, the bolts use knicker elastic to pull the bolts open again when the cam is returned to the central position.
This is one box's mechanism open with the cam centered...

And locked with the cam rotated. Note the extended elastic between the bolt handles.

Once I had devised a standard mechanism, I just had to repeat it for the other three boxes.


These mechanisms got better each time. For example, the cam and levers work more smoothly if the lever arms are curved concavely on the cam-facing side.
By using a smaller cam, there was also room to add additional elastic at both ends of the scissor action. This meant a the bolts were re-opened more smoothly when the cam returned to the open position.
Closed, with stretched elastic and cam off-centre...

Open with cam centred and elastic relaxed having pulled the bolts open again...

Open with the cam centred...


Closed...

Open...

Adding audio to the opening mechanism...
Having a bespoke hand-carved caricature of yourself as the opening handle on your christmas gift box is OK, but what if it could spout inappropriate obscenities at you too. Now that would be cool.This was a stupid throwaway thought that had flashed across my mind fleetingly while pondering different ideas. I imagined it would be way too hard to achieve.
However, taking a punt on a casual perusal of the Interweb, googled upon Talking Cubes. These little babies are self-contained white cubes that allow you to record up to 20 seconds of audio using a built-in mike and then play it back using a simple push button - genius!
(in fact they are even cleverer than that as they also have audio line-in for transferring prepared audio tracks and electronic activation inputs for automating the playback )
Shout out to them. They are also very reasonably priced:
https://www.talkingproducts.com/recordable-cards-gifts/talking-cubes-cards-gifts/talking-cube.html
Here is one next to one of the heads

It's 35mm on each side (an inch and a third or so)

Like the opening cam mechanism, the first version on one box was bettered on subsequent boxes.
Adding in the audio using the Talking Cube was crude and difficult with the physical button-pressing method. This later version used the Talking Cube's excellent electronic trigger inputs to make this much more reliable. A simple metal-to-metal contact makes the audio play. This is much more reliable than needing a button to be pressed.

Here also you can see the housing that was built up on the lid to contain the lever mechanism. This was all hidden in the final version, by the decorative wooden face attached on top of this.

In other words, the box lids seen so far were not the final aesthetic layer. This was a an oak plank. The locking mechanism with its bolts, cam and levers was sandwiched between the plywood box door and the upper oak face plank.


This was repeated for the other boxes...


Finishing
The boxes were more or less complete, but a little dowdy. To make them more plinth-like, Some decorative architrave was added to the base.

In close-up...

And another...

And another...


Shiny...

Well bronzed...

Ta-dah!


From this angle, there is an Easter Island vibe going on


Priming the charge with gunpowder
Not shown here was that each head was coverted into a cannon by drilling a vertical barrel into its top using a 14mm drill bit. This would be used to charge the head with gunpowder, reclaimed from cheap fireworks.A separate fuse channel was also drilled from the mouth of each head with a 1.5mm bit, to fit in the fuse wire.
In this shot, you can see the barrel being primed with gunpowder and the fuse in place in the mouth of the carved head, ready to be lit.
