My latest makey pre-occupation is to make some sort of ventriloquist dummy head, which can then later be extended to be manually operated as a puppet, or controlled as part of an automaton, either using manual means or electronically assisted in some way, like using actuators or servos or both.
Whatever the thing that I end up making, the first thing it needs is a head.
I want this to be wooden, just because I like wood. It looks timeless and is enjoyable to work with.
This post describes how I made a basic head to get started.
It is carved using power tools from a base block created by laminating chunks of oak log together.
Later it will be animated in some way, depending on exactly what I end up making. For that, it will need its eyes gouging out and its lower lip cut off, but hey - it's only wood. It won't feel a thing.
I haven't decided if I'll bother with moving eyebrows yet. Maybe.
Anyway, here it is.

This was created using lots of power tools, some of which are shown below....

Raw materials
This was carved from a log. Several oak logs in fact. Here is one of the logs from which it was hewn...I picked this up in the woods a year or more ago. and left it in the shed to season. It's still a bit green, but that's fine.

Here's another angle...

Extracting wood from logs
After a bit of sawing up into lengths, I split the logs to get some raw block shapes. To do this, I used my hand axe as a wedge and the lump hammer to drive it into the log.

This is best done on something solid. In this case, a good use for my lovely anvil.

Eventually I ended up with some nice squarish blocks. As well as these blocks, some logs were just planed as they were to give two flat edges.


Seeing what pieces would work
Anyway, if you are using pieces of log, you need to play about to see how they fit together..
I chose some blocks that when arranged together, looked sufficient for a head.NB - I have completely missed a step here, which was de-barking the split logs. That was done with a chisel and an electric planer.

As always, at some point you need to get the pencils out...


I realised though, that the wooden block in the middle was bigger than needed, so I cut a bit off.

Cue the chainsaw...

That's better.

I had also decided that I'd wanted to have the head articulated separately from the neck.
Here are the three pieces I needed for just the head.

These needed joining before they could be carved, but of course, the faces of these pieces were rough from splitting, so I put them through the Beast...
This monster is a planer-thicknesser. It levels off and smooths the faces like you wouldn't believe. It isn't something to get your arm caught in though. It is a very scary machine.

After planing, the lovely oak grain becomes much more visible. I was using smallish branch logs. These had some good irregularities in the grain from branch knots etc.

The planer left the blocks glassy smooth, ready for jointing

Another angle...

And now ll smoothed, the block pieces fitted together really tightly...

Really snug due to being flat and smooth.

Temporary jointing of the pieces into one block
Before carving, I needed to join the pieces together. For this, I used a long bolt through the pieces. This would allow me to take the pieces apart later.To insert the bolt, I drilled a hole drilling through the top of each block.

This is best done in the vice.

The hole was drilled through the blocks above the top of the head, so it could be left in place while I was carving the head itself. The blocks were secured with nuts on either end. These were bolted on tight. Friction did the rest.

Here is the starting block, ready to be carved as seen from the front. I haven't drawn the face on yet.

Here it is from above. You can see how close the blocks fitted together after the planing...
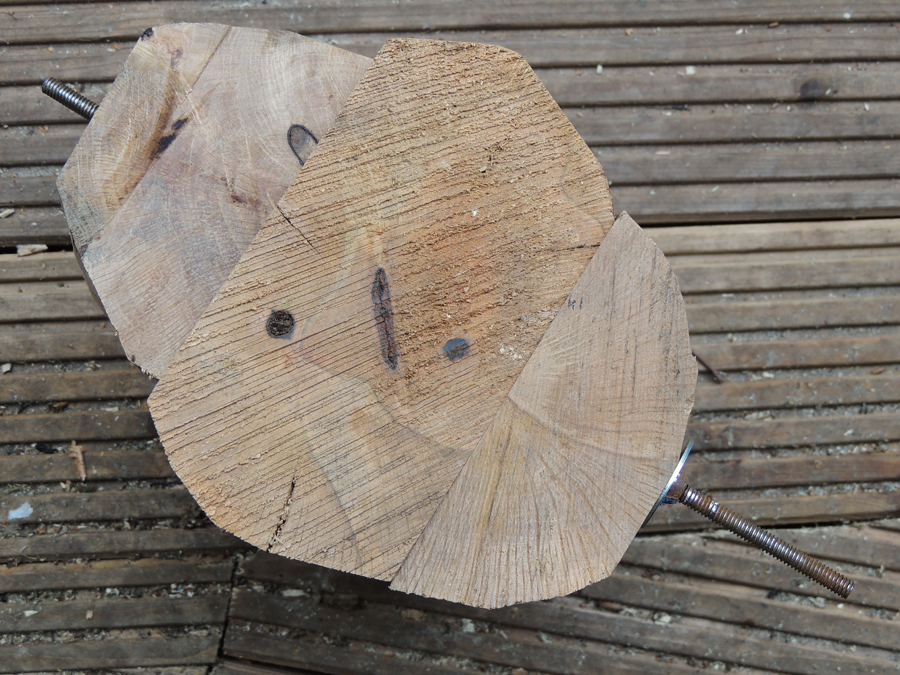
Here's a closer view showing the neat join.

mmm...

I then drew the head on as a carving guide. Here is the side (silhouette) view.

And here is the guide drawing for the face drawn on. I didn't really worry too much about what this looked like. It just needed to be a generic face

And here is the silhouette drawn on the other side.

I finally bought an Arbortech woodcarving blade
OMFG - I have coveted owning an Arbortech carving tool for years. The reason I have never bought one is that they are quite expensive at about £100 they cost.
But I finally did it and it was a revelation, like a magic treat.

Arbortechs are really just a specialist cutting blade for an angle grinder. You bolt them on your grinder just like a normal blade. The blade is a disc with three little circular section tungsten carbide blades attached at 90 degrees. When spinning they cut a groove like wood carving gouges.
The big difference is the power, My grinder is quite heavy duty so it has plenty of oomph. It also spins at about 12,000 rpm. With three blades on the revolving disc, that's 36,000 cuts a minute or 600 per second!
But I finally did it and it was a revelation, like a magic treat.

The big difference is the power, My grinder is quite heavy duty so it has plenty of oomph. It also spins at about 12,000 rpm. With three blades on the revolving disc, that's 36,000 cuts a minute or 600 per second!
This cuts through the tough oak like butter - amazing. I LOVE this.

With such a beast of a tool, the head needed to be securely clamped in the vice...


With the Arbortech, roughing out takes seconds...

And because it is so brutal, you can really carve out the basic shape super quick. This is good.
One of the problems with doing this with normal chisels, is it takes quite a while and there is always a temptation to start finessing details before the roughing out of the core shape is done.
The Arbortech accelerates this process. Despite its power, it can give quite a subtle control.

Here is the guide-drawing for the face.

Which was used to hack out the shape thus...

Here the basic shape of the nose, chin and jaw have been roughed out.

Of course as you carve, the pen marks get carved off, so they needed reapplying.

Halfway through I also had to trim the retainer bolt back because it was getting in the way.

This left the face much more accessible to get carving on.

Here, after more shaping, the form of the cranium is taking shape.

Here is the basic face shape emerging.

After a bit more work, the temples and ear shapes were blocked out.

Swapping from roughing out to fine carving.
After the basic shape of the head was created in the round, it was time to swap power tools from the enormously effective carving power of the Arbortech blade to something much more subtle.This is a solid tungsten carbide steel rotary burr. I have various. This one is fairly coarse for fast removal. This is used in a rotary die grinder. This is a specialist metalworking tool. The burs are meant for cleaning up castings, mouldings and dies.
These burrs have about 10 cutting edges round their cutting head. The die grinder they are used in, is similar to an angle grinder except they have a collet head which holds bits like these burrs.
The spin even faster than angle grinders. My die grinder spins at 25,000 rpm. With 10 cutting edges this means there are 250,000 cuts on the wood per minute or about 4,000 cuts per second - awesome!

Here the head has been clamped back in the vice.

This rounded cone shape allows quite subtle carving. You need both hands to keep it under control.

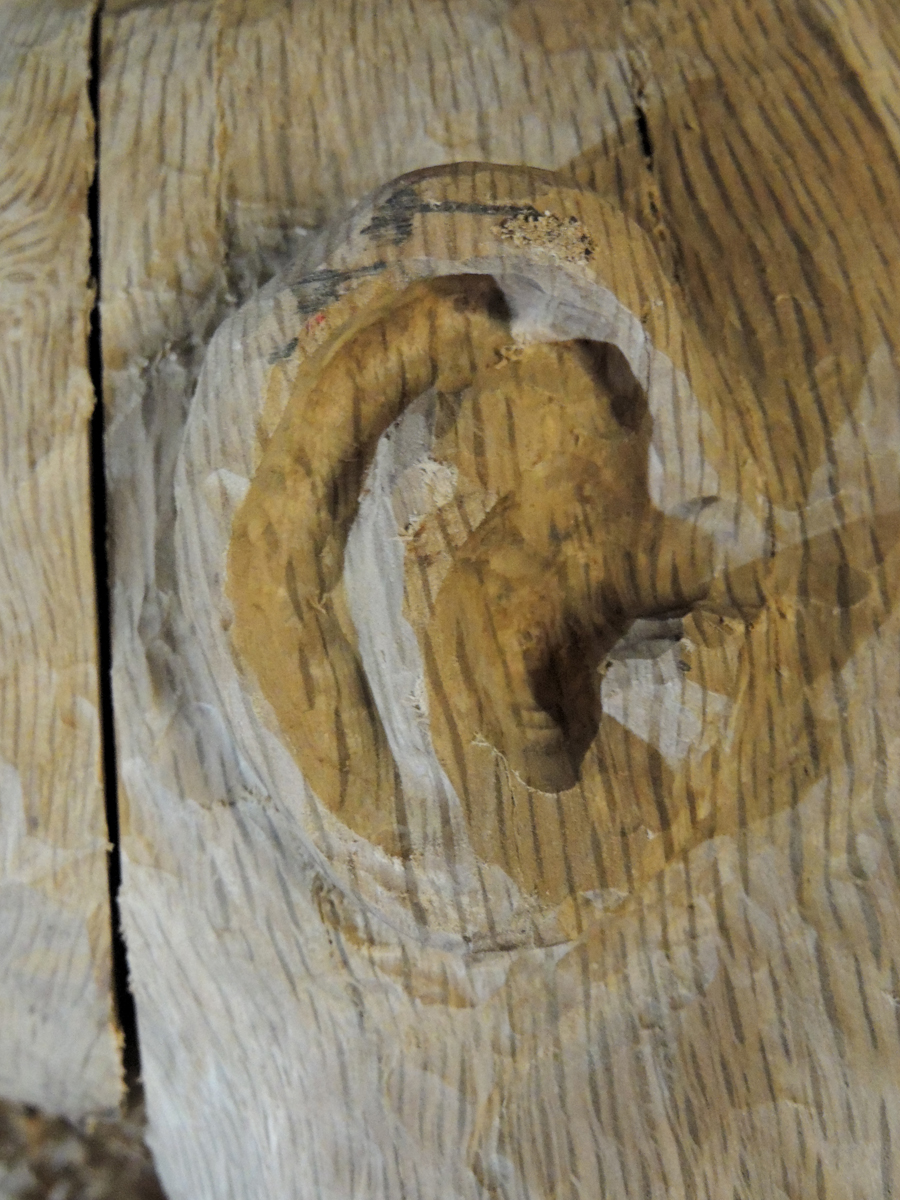
Here, I have started on the eye sockets. The right one...


Another variation...

For areas that need to be carefully carved, the best way to keeping the spinning burr from slipping across the wood is to adopt a braced grip with the arms tensed slightly against the body.

You can also rest the grinder on the shoulder to stop the tip getting out of control. Here, I'm carving the lips.

These pictures show the facial features emerging from the burr carving.
Note the nostrils have been carved out here...


Here you can see the initial bur guide cuts round the eyes.

The philtrum (the little groove between the nose and mouth) and lips

Eye definition (close-up)

More initial shape details roughed out with the burr...


The ears were deliberately left till last, because while still only blocks they could be used for holding the head in the vice.
By this stage, it was time to carve the ears out of these blocks.
The right ear...
And the left one.

Here's a side-lit mood shot.

Starting to look a bit more creepy...

Some more shots...


This shot was taken almost at the point where carving stopped.

Sanders - the final finishing tools
By this point, I stopped using the burrs and switched to sanding. For this, I used my multi-tools. The mains Fein is the most powerful (and smoothest). The cordless Makita is handy though

The burr-carve wood was first smoothed out using 80 grit sandpaper sheets

Later, these 120 grit papers were used.

I also used a rotary sanding stone occasionally.

And the filing sander, which has a narrow 9mm belt.

Here, I am smothing the convex curve of the cranium...

Eventually the head was looking smooth!

Another mood shot.

And finally after lots of sanding

Next step - eyeballs
No comments:
Post a Comment